As Bitcoin and other cryptocurrencies gain popularity as a mode of payment transfer, it has become common for the average Bitcoin user to be scammed by an anonymous identity who requests payment for some work is then never heard from again. The decentralized nature of cryptos certainly has a tradeoff – unlike a credit card or bank transaction that can be reverted, a cryptocurrency transfer once confirmed is permanently recorded on the Blockchain. This is where multi-signature (multisig) wallets come to our rescue.
A multisig wallet is a special bitcoin wallet that requires more than one private key to sign transactions. Most multi-signature setups usually involve three parties – the sender of the payment, the recipient, and an escrow agent. Each of the three parties holds one private key, and to send any transaction, at least two private keys must be used.
Typically, escrow agents are trusted members of the Bitcoin community or registered entities who arbitrate any disputes that may arise. Therefore, the buyer is protected in case the seller turns out to be fraudulent, and the seller, too, is assured of payment even if the buyer refuses to pay.
Creating a Multisig Wallet
There are many ways to create a multisig wallet. In fact, most Bitcoin clients support the multisig protocol. Electrum and Armoury are used by many crypto holders because they have provisions for advanced settings like custom fees etc. which are great for power users. BitGo is another popular option for those who prefer a web-based client. In my opinion, however, CoPay offers the most streamlined, easy to use interface, that is usable by anyone, even a new Bitcoin user. So for the purposes of this tutorial, I will be using
Step 1: Download CoPay
Head over to the CoPay website and download the appropriate installer for your platform. A great advantage of using CoPay is its support for nearly all desktop and mobile platforms (iOS and Android included).
Step 2: Start by setting up your personal wallet
Open the installed app, and run through the quick setup to create your personal wallet. This will involve typing in an email address for transaction notifications, and noting down a mnemonic phrase that can be used as a backup in case CoPay is accidentally deleted from your computer.
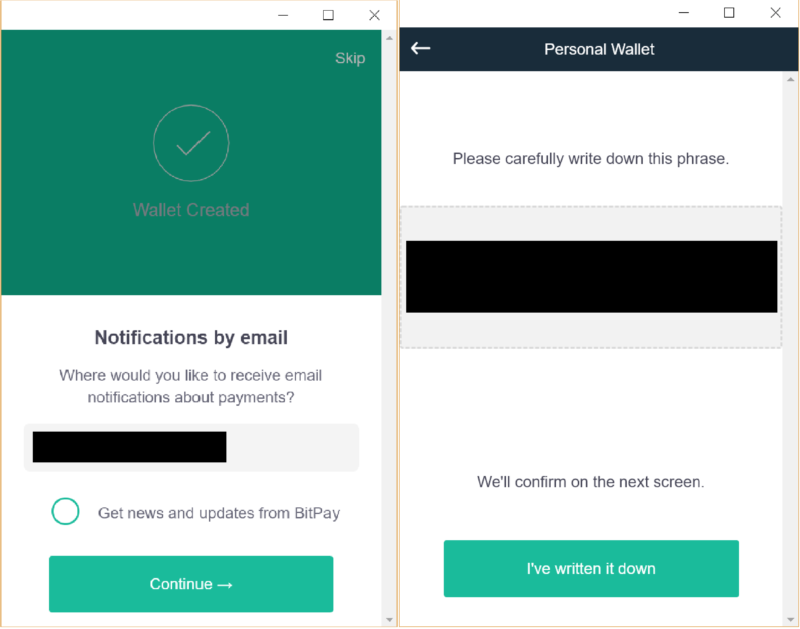
The first few screens will help you create your CoPay Personal Wallet.
Step 3: Create a Shared Wallet
Multisig wallets are called ‘Shared Wallets’ in CoPay. Once your personal wallet is set up, click on the shared wallet option on the CoPay home screen to create a multisig wallet. You will be presented with a screen where you can configure the wallet with the number of co-payers, the number of signatures required etc. depending on your needs.
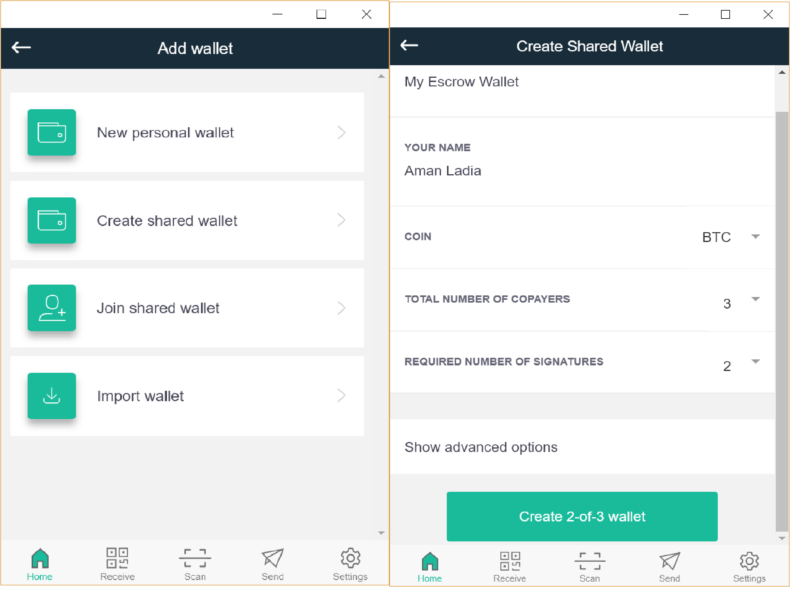
You can customize your CoPay Wallet based on your needs.
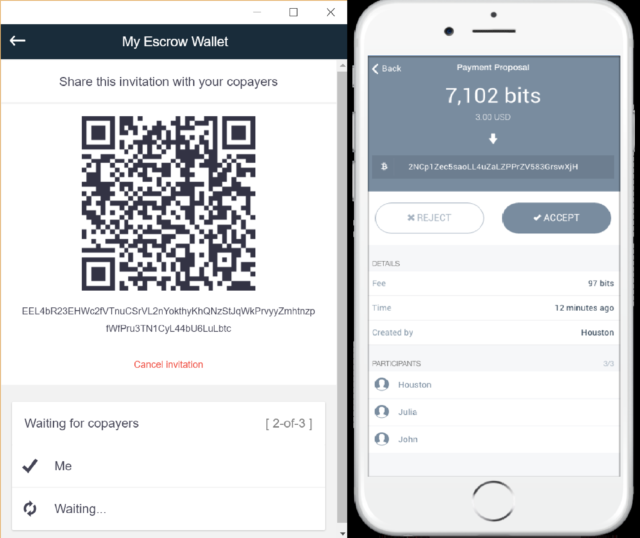
Step 4: Share the CoPay invite with others
The last step is to share your multisig wallet with the 2 other parties. Send them the CoPay code displayed or ask them to scan the QR code. That’s it! Your CoPay escrow is set up! Now everytime someone requests a payment, you will receive a notification to confirm the transaction.
Have you ever used a multisig wallet before? What additional steps do you take to protect your bitcoin transactions? Let us know in the comments below.
Images courtesy of CoPay, Shutterstock
The post Protect Your Online Bitcoin Transactions Using a Multisig Escrow Wallet appeared first on Bitcoinist.com.