
Last updated on November 25th, 2017 at 06:38 pm
On October 24, 2017, a new type of Bitcoin was created: Bitcoin Gold. This altcoin has the same abilities of Bitcoin, but its mining algorithm works a bit differently. Most importantly, it’s easier to mine with home equipment like GPUs.
Anyone who held Bitcoins before the time of the creation of Bitcoin Gold is eligible to receive an amount of Bitcoin Gold (BTG) equal to the amount of Bitcoins (BTC) they had. For example, if you had 1 Bitcoin before the split (aka the Bitcoin Gold fork), you’ll now have 1 Bitcoin and 1 Bitcoin Gold.
If, by chance, you had your Bitcoins stored in one of the supporting Bitcoin Gold exchanges, you may not have to do anything because you’ll have been automatically credited the relevant BTG amount by the exchange. Here’s a list of supporting exchanges:
The purpose of this guide is to give you a basic step-by-step guide on how to claim your Bitcoin Gold. However, before we start, I’d like to provide an important warning: If at any step along the way you’re not sure what to do, please stop whatever it is you’re doing and seek advice. While this guide is simple, it holds the risk of losing your Bitcoins if you make a mistake along the way. It’s better to be safe than sorry.
I’ve personally used this method to extract my own Bitcoin Gold from my Ledger Nano S wallet, and I can testify that it works. However, use this guide at your own risk—I don’t want to be responsible for anyone losing their funds.
TL;DR version
- Move your current Bitcoins to a new Bitcoin wallet with a new seed/private key.
- Export the seed phrase of your previous wallet.
- Import the seed phrase into Coinomi.
- Add Bitcoin Gold to Coinomi and change the derivation path.
- Claim your BTG.
This is a very short explanation of the process; I highly advise that you read the whole guide and not just the summary to avoid mistakes. Also, this process requires that you use Coinomi, a Bitcoin mobile wallet currently available only for Android. If you don’t have an Android mobile phone, I suggest getting one for this process and moving your BTG to an exchange once you claim them.
You also have the option of using the official Bitcoin Gold client, but this means you’ll need to download the whole Bitcoin blockchain to your computer, and that can take several days.
NOTE: This process will work with most HD wallets (i.e., wallets that have a seed phrase); however, some wallets, such as TREZOR, require a dedicated tool (full process described here). I strongly suggest searching for documentation from your existing wallet provider regarding this process before using what’s written in this post.
November 17 updates:
Ledger users – A dedicated wallet for Bitcoin Gold has been released. If you’re using Ledger read more here.
TREZOR users – See updates on a dedicated splitting tool here.
Step 0: Before you start
The first thing to do is secure your current Bitcoins in a new wallet. Since you’re going to expose the private key/seed phrase of your old wallet, you’ll want to make sure that even if it’s compromised, no one will be able to get to your coins. Once the seed is compromised, you never want to use it again to store Bitcoins.
What you need to do is download a new wallet to your computer or mobile phone, or even get a brand new hardware wallet and move your Bitcoins to that wallet. Only when your Bitcoins are safe in the new wallet should you start this process.
A good desktop wallet to use for this process is Electrum since you can create multiple Bitcoin wallets from within the app. Make sure you’re sending your Bitcoin to a completely new wallet, not just a new Bitcoin address. The way you can verify this is if you get a new set of words as your seed phrase.
Step 1: Get your seed
The first step of the process will be to get your seed phrase. The seed phrase is the 12–24 words you were requested to write down when you first installed your wallet. Most wallets will have an option to display the seed phrase as well.
You need this phrase to prove that you owned Bitcoins before the fork. This phrase is considered sensitive data because whoever knows it can access your Bitcoins. That’s why you should move your Bitcoins to a new wallet before using it.
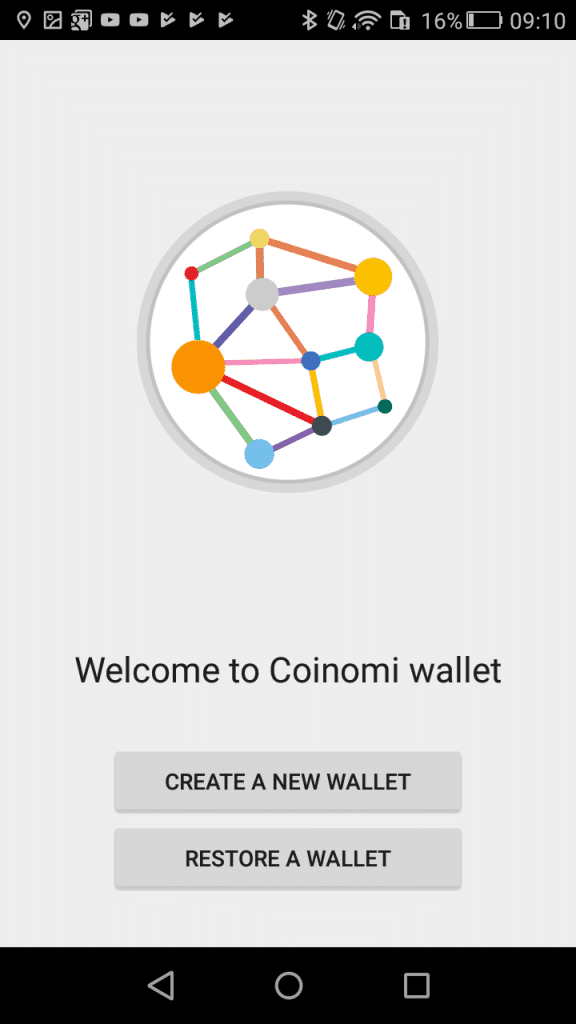
Step 2: Install Coinomi and import your seed
If you already have Coinomi on your Android wallet, great! Make sure to create a backup of your existing wallet since this process may wipe out your existing funds.
If you don’t have Coinomi, install it. Once the wallet is installed, open the app and choose Restore a Wallet.
You will then be asked to enter your seed phrase. Enter the 12–24 words and click Next. On the next screen, choose Bitcoin or any other currency you want; there’s no need to choose Bitcoin Gold for now.
Step 3: Claim your Bitcoin Gold!
- Inside the wallet menu, click on +coins.
- Choose Bitcoin Gold.
The following may be required depending on the wallet you’re importing your BTG from:
- Click on Advanced Settings.
- Type in the phrase “M/44H/0H/0H” (note that the characters before the H are zeroes).
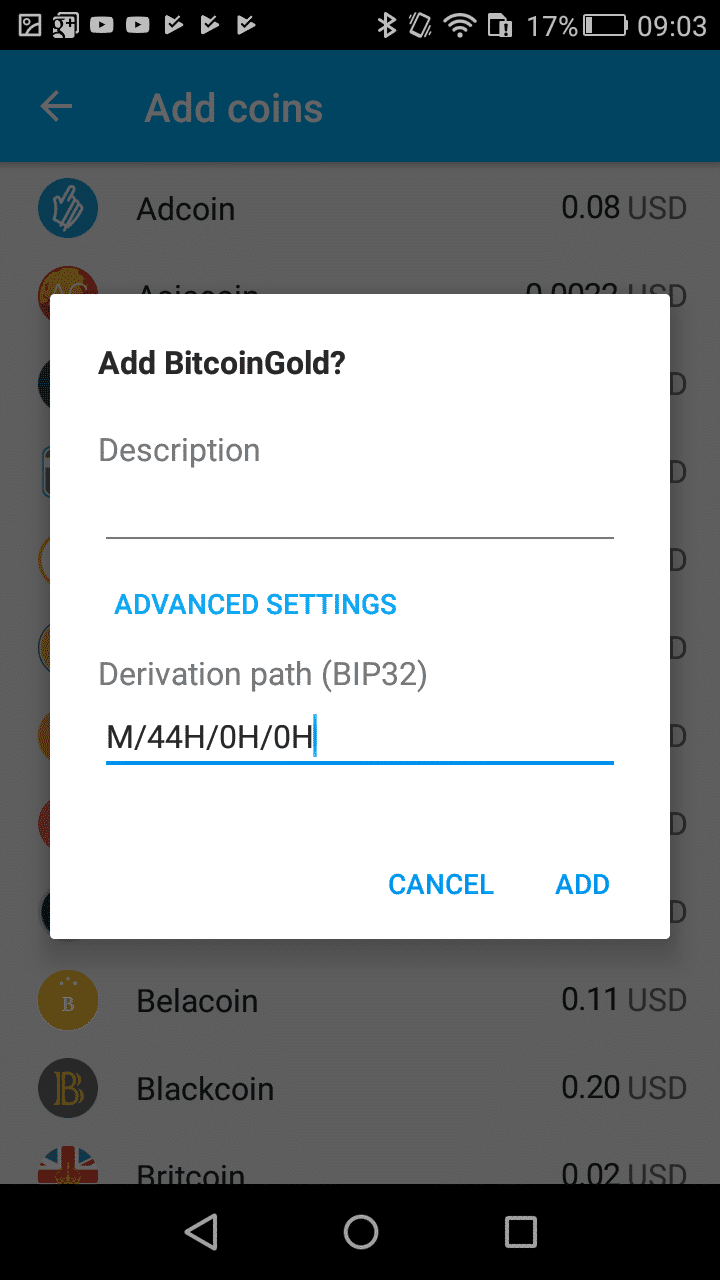
If you have more than one Bitcoin wallet in your Coinomi and want to claim the equivalent BTG, you’ll have to repeat the above process, replacing the last zero with the zero-based account index each time. For the second wallet, it would be M/44H/0H/1H, for the third wallet, it would be M/44H/0H/2H, and so forth (source).
If you still can’t understand the whole process, here’s a great video about it:
NOTE: If you’re trying to import a private key from a paper wallet (meaning not a seed phrase), you can click Create New Wallet in Coinomi and choose Sweep Paper Wallet from the settings.
If this process doesn’t work for you
If importing the seed into Coinomi doesn’t work for you it’s always possible to extract the actual private key for your Bitcoin addresses using Electrum and sweeping (i.e. importing) that into Coinomi.
The process is as follows:
- Download Electrum
- Create a new wallet from your seed phrase
- Export the private keys of your wallet
- Write down the private key that had Bitcoins in them prior to the fork
- Create a Coinomi BTG wallet
- Sweep the private key into the Coinomi BTG wallet
For a complete demonstration of how it’s done click here.
Step 4 (optional): Sell your Bitcoin Gold
You can now send your Bitcoin Gold to an exchange and sell it for Bitcoin, USD, or any other altcoin if you wish. At the moment, the only exchange I know of that accepts outside BTG deposits is HitBTC.
UPDATE: Bittrex also accepts outside deposits and the exchange rate seems to be much higher. However withdrawal requires account verification that can take up to one week. HitBTC does not require account verification. Also there have been several complaints about the exchange in the past.
Once you sign up to HitBTC, go to Accounts and deposit your BTG as shown here:
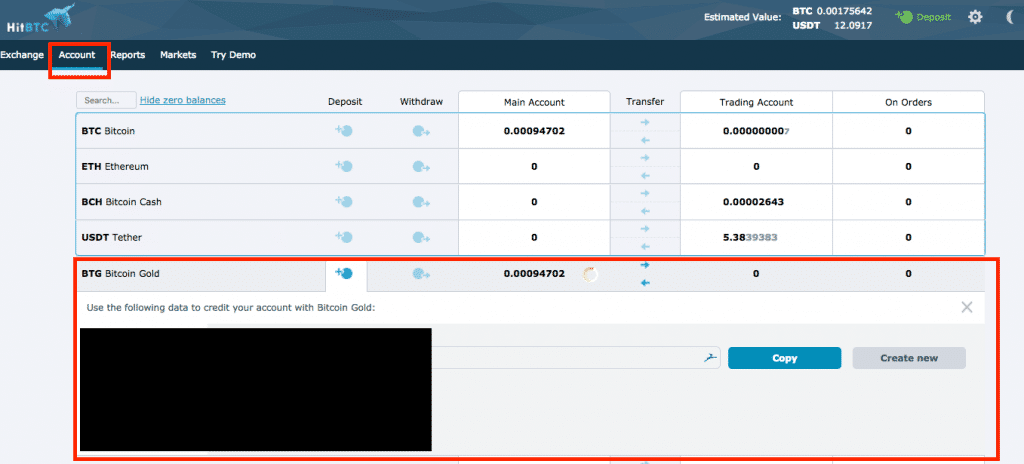
After the transaction is sent, you can follow it through a Bitcoin Gold block explorer. When three confirmations are met, you’ll see the transaction in your HitBTC account. You’ll now need to transfer the funds to your trading account (using the arrows in the image above).
You can then continue on and exchange BTG for whatever currency you wish.
That’s it for this tutorial. If you’ve managed to claim BTG I’d love to hear about what wallet you used and about the process in the comment section below. If you didn’t manage to claim – let me know as well so I can improve this guide.

Ofir Beigel
Blogger and owner of 99Bitcoins. I’ve been dealing with Bitcoin since the beginning of 2013 and it taught me a lesson in finance that I couldn’t get anywhere else on the planet. I’m not a techie, I don’t understand “Hashes” and “Protocols”, I designed this website with people like myself in mind. My expertise is online marketing and I’ve dedicated a large portion of 99Bitcoins to Bitcoin marketing.
Latest posts by Ofir Beigel (see all)